Electrical - Guides, Tools & Licensed Electricians Near You
Everything homeowners need to know about electrical work - from panel upgrades and EV charger installation to aluminum wiring hazards, permits, generator installation, and finding a licensed electrician in your city.
Enter your city or ZIP code to find a licensed electrical professional near you
Resource Library
Electrical Guides
One authoritative guide per topic - applies to every market, updated regularly.
Electrical Panel Upgrade Guide
When to upgrade from 100A to 200A, what the process involves, permits required, and typical costs by city.
Read guide →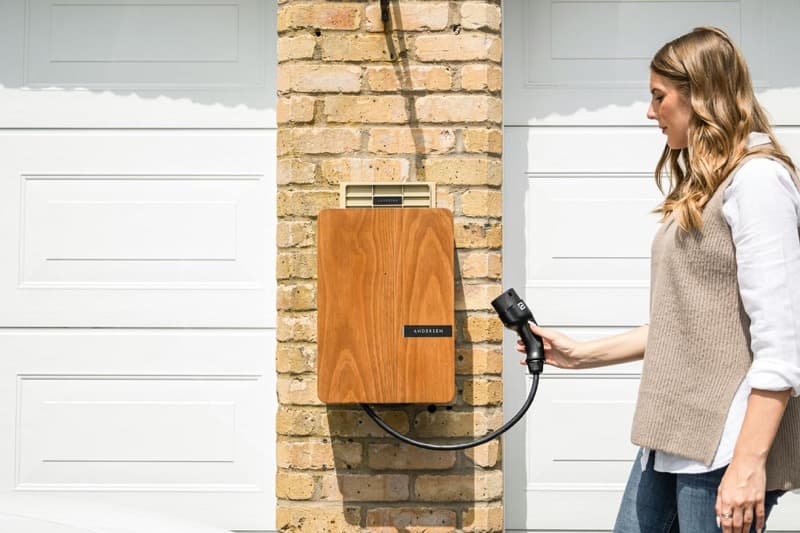
EV Charger Installation Guide
Level 1 vs. Level 2 chargers, installation requirements, utility rebates, and the IRA 30% federal tax credit explained.
Read guide →
Aluminum Wiring Safety Guide
Is aluminum wiring dangerous? What homes are affected, repair options (COPALUM vs. full rewire), and insurance implications.
Read guide →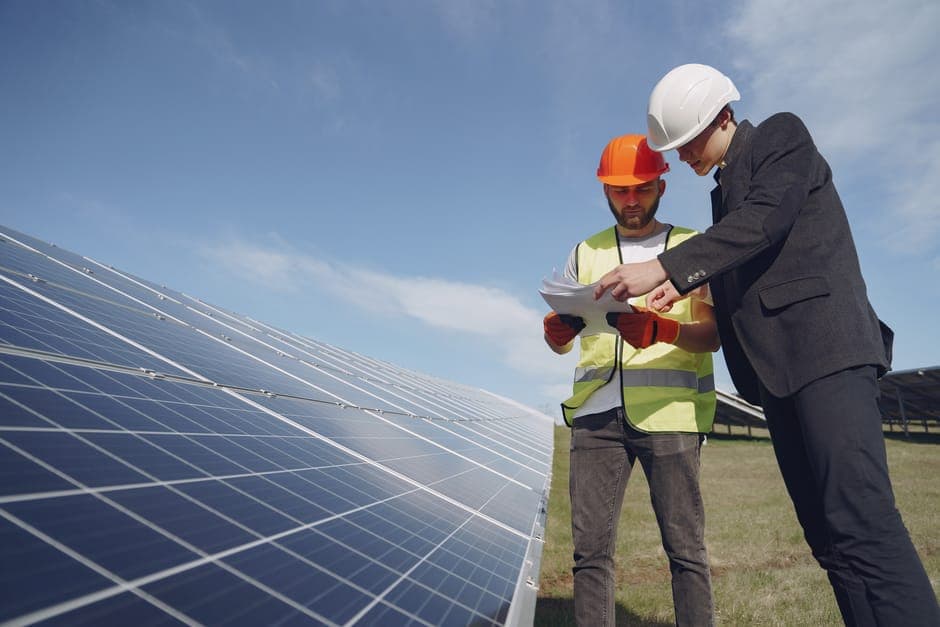
Electrical Insurance & Code Compliance
What homeowner insurance requires for electrical systems, when knob-and-tube wiring affects your coverage, and code upgrade costs.
Read guide →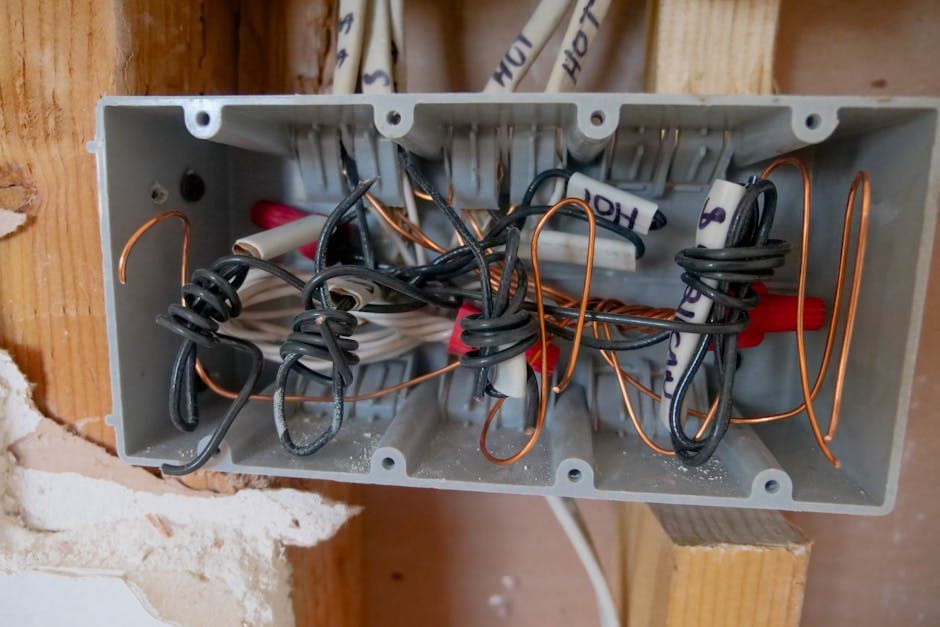
Whole-Home Rewiring Guide
When full rewiring is necessary (knob-and-tube, aluminum wiring, fire damage), what the process involves, permit requirements, and cost breakdown by home size.
Read guide →
Home Generator Installation Guide
Standby vs. portable generators, sizing for your home, automatic transfer switches, fuel type tradeoffs, permit requirements, and installation timeline.
Read guide →
Home Electrical Inspection Guide
What a licensed electrical inspection covers, when you need one, how to read the report, and what to do when hazards are found.
Read guide →National Pricing
Electrical Cost Guide
National averages - enter your city for local market pricing.
| Project Type | Low | High | Typical Avg |
|---|---|---|---|
| Panel Upgrade (100A → 200A) | $1,500 | $4,000 | $2,500 |
| EV Charger Installation (Level 2) | $400 | $1,500 | $900 |
| Outlet / GFCI Installation | $100 | $350 | $200 |
| Ceiling Fan Installation | $100 | $350 | $200 |
| Whole-Home Rewire (2,000 sq ft) | $8,000 | $20,000 | $13,000 |
| Generator Installation (standby) | $3,500 | $12,000 | $7,000 |
| Lighting Installation (per fixture) | $75 | $250 | $140 |
| Emergency Electrical (after hours) | $200 | $600 | $400 |
| Electrical Inspection (written report) | $150 | $400 | $250 |
Installed cost includes labor, materials, and permit fees for a standard single-family home. High-cost markets (New York, Los Angeles, San Francisco, Seattle) run 20-40% above these national averages.
Get local pricing for your city
National averages don't tell you what contractors in your market are charging. Enter your city to see hub-specific pricing.
Editorial
Electrical Blog
Guides, tips, and advice for every market - not city-specific.
When to Upgrade Your Electrical Panel (And What It Costs)

EV Charger Installation: IRA Tax Credits, Utility Rebates & What to Expect

Standby Generator Installation: Sizing, Fuel, Permits & Cost

How to Find a Licensed Electrician (And Red Flags to Avoid)
Whole-Home Rewiring: Everything You Need to Know Before Starting
Home Electrical Inspection: What Gets Checked, What It Costs, and What to Do With the Report
DIY Reference
Seasonal HVAC Checklist
Quick maintenance steps every homeowner can do before each season to keep their system running well.
Before Summer (April-May)
- Test GFCI outlets (pool, outdoor, kitchen, bath)
- Clear 3ft around outdoor panel and generator
- Check AC circuit breaker - note any warm or humming breakers
- Inspect outdoor lighting fixtures for pest or moisture intrusion
Before Winter (October-November)
- Test generator monthly - run under load for 30 minutes
- Inspect heat tape wiring on exposed pipes (Northern climates)
- Test hardwired smoke and CO detectors
- Schedule pre-holiday electrical inspection if home is over 25 years old
ProvenQuote Tools
Electrical Tools & Calculators
Free calculators - estimate costs, plan materials, assess damage, and understand insurance before talking to a contractor.
EV Charger Installation Cost Calculator
FreeEstimate your Level 2 EV charger installation cost based on panel distance, wiring complexity, and charger type. Includes IRA 30% tax credit savings.
Use tool →Panel Upgrade Cost Calculator
FreeGet a cost range for upgrading from 100A to 200A or 400A service based on home size, current panel brand, and permit requirements.
Use tool →IRA Electrical Tax Credit Calculator
FreeCalculate your federal IRA tax credits for EV charger installation (Section 30C, up to $1,000) and panel upgrade (Section 25C, up to $600).
Use tool →Circuit Breaker Load Calculator
FreeCheck whether your panel can support an EV charger, hot tub, or home addition by calculating your home's current electrical load.
Use tool →GFCI/AFCI Requirements Checker
FreeFind which outlets in your home require GFCI or AFCI protection under NEC 2023 and whether your home is up to code.
Use tool →Coverage & Claims
Electrical Insurance & Coverage Requirements
Homeowner insurance typically covers sudden electrical damage - lightning strikes, power surges, and accidental shorts. However, it excludes wear-and-tear failures, outdated wiring (knob-and-tube, aluminum), and code upgrades required after a claim. Some insurers will not cover homes with Federal Pacific or Zinsco panels at any price.
- Covered: lightning damage, accidental power surges, sudden wiring failures
- Not covered: wear-and-tear, code upgrades, outdated wiring maintenance
- Knob-and-tube or aluminum wiring: many insurers require remediation before issuing or renewing coverage
- Federal Pacific / Zinsco panels: some carriers refuse coverage or charge significantly higher premiums
- Document your electrical system with an inspection report - supports future insurance claims
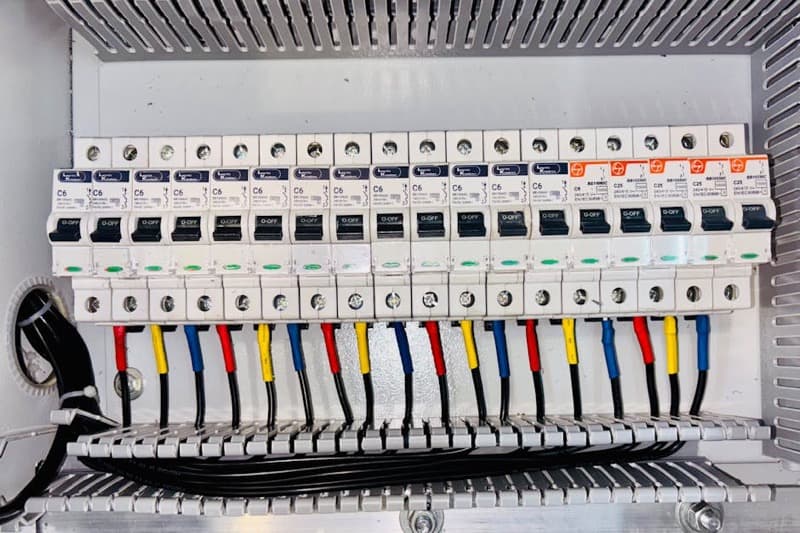
Panel Brand Red Flags
Used in millions of homes built 1950s-1980s. Breakers documented to fail to trip under overload - creating silent fire risk. Many insurers refuse coverage or require replacement. A licensed electrician can inspect and quote replacement.
Panels manufactured before 1983 that have documented breaker failure and overheating issues. Similar insurance implications to Federal Pacific. If you have a Zinsco panel, budget for replacement and get quotes before your next policy renewal.
Check your policy declarations page to confirm your coverage type before filing any claim.
Weather Intelligence
Storm Surge, Outages & Electrical Emergency Demand
Lightning strikes and power surges are the top electrical storm hazards - whole-home surge protectors cost $250-$500 installed and protect all connected appliances. Generator installation demand spikes dramatically after prolonged outages from hurricanes and ice storms, with 4-8 week contractor backlogs common after major events.
Hurricanes + grid failures. February 2021 ERCOT grid collapse left 4.5M homes without power. Generator demand surges with every named storm. EV charger installation also growing rapidly.
Highest lightning density in the US. Direct strikes and surge damage peak June-September. Generator installation demand also spikes post-hurricane. Whole-home surge protectors are standard practice.
Hurricane Ida left 1M+ without power for weeks. Standby generator and transfer switch installations are near-mandatory in this market. High humidity also causes rapid outdoor panel and service entrance corrosion.
Ice storms cause multi-day outages each winter. Generator and transfer switch installations spike after each event. Aluminum wiring is common in 1960s-70s suburban homes.
Polar vortex events cause sustained outages. Older pre-1960s electrical infrastructure in Chicago bungalows adds risk. Knob-and-tube wiring is common in Logan Square, Pilsen, and Bridgeport neighborhoods.
Wildfire-related public safety power shutoffs (PSPS) drive battery backup and generator demand in wildfire zones. Solar + battery storage driving very high panel upgrade volume in LADWP and SCE territory.
Ice storms cause catastrophic multi-week outages. The 1998 Ice Storm remains Canada's costliest insurance disaster. Generator demand and electrical repair work spike every winter across Ontario and Quebec.
Queensland cyclones and NSW/VIC extreme heat events drive surge demand for emergency electricians. High solar + battery adoption across all major metro areas is driving switchboard upgrade demand.
Live Electrical Emergency Demand Alerts
Real-time demand surge tracking by ZIP code - mapped to ProvenQuote hub markets. Tracks generator installation backlogs, storm-related electrical damage, and panel failure spikes following extreme weather. Integrated with NOAA and utility outage data.
Terminology
Electrical Glossary
Key terms used by contractors, manufacturers, and insurers - explained plainly.
Amperage (Amps)
Circuit Breaker
GFCI (Ground Fault Circuit Interrupter)
AFCI (Arc Fault Circuit Interrupter)
Level 2 EV Charger
Transfer Switch
NEC (National Electrical Code)
Knob-and-Tube Wiring
Service Entrance
EPA Section 608 (Electrical Context)
Questions & Answers
Electrical Questions Clients Ask Most
Detailed answers to the most-searched questions — cost, hiring, DIY limits, emergencies, and maintenance.
How much does it cost to upgrade an electrical panel?
When do I need a 200-amp panel?
How much does EV charger installation cost?
What is AFCI protection and do I need it?
What is GFCI and where is it required?
How much does whole-home rewiring cost?
What are signs I need an electrical panel upgrade?
Do I need a permit for electrical work?
How long does electrical panel replacement take?
What is the 30% IRA tax credit for electrical upgrades?
How do I find a licensed electrician?
Is aluminum wiring dangerous?
What causes a breaker to keep tripping?
How much does generator installation cost?
What is a Level 2 EV charger and how does it work?
What does a home electrical inspection include?
How do I know if my house needs rewiring?
What is a standby generator and how does it work?
How long does EV charger installation take?
Common Electrical Questions
Do I need a permit for electrical work?
How much does a 200-amp panel upgrade cost?
Is there a federal tax credit for EV charger installation?
What is aluminum wiring and is it dangerous?
How do I know if my electrical panel needs to be replaced?
How much does whole-home generator installation cost?
What causes circuit breakers to keep tripping?
How do I find a licensed electrician near me?
When does a home need to be completely rewired?
When do I need a home electrical inspection?
What size standby generator do I need for my home?
For Electrical Contractors
Own Your City.
Lease Your Market.
ProvenQuote features one exclusive contractor per city - dedicated, licensed, and ranked first across your local market. No shared leads. No bidding wars. Just direct homeowner requests.
For Businesses & Brands
Reach clients actively researching electrical work - panel upgrades, EV chargers, generators, aluminum wiring, and emergency service.
Local Electrical Professionals
Find a Pro in Your City
Each city hub features one dedicated, exclusive electrical contractor. Enter your city or ZIP to find yours.
Live Markets